joplin-vieweb
A web viewer for Joplin app
Please wait until it's ready... it should be quite soon.
Installation / configuration instructions
! Only linux systems are supported
! Only arm64 and amd64 architectures
! For raspberry users (I am): use 64 bits OS
Installation
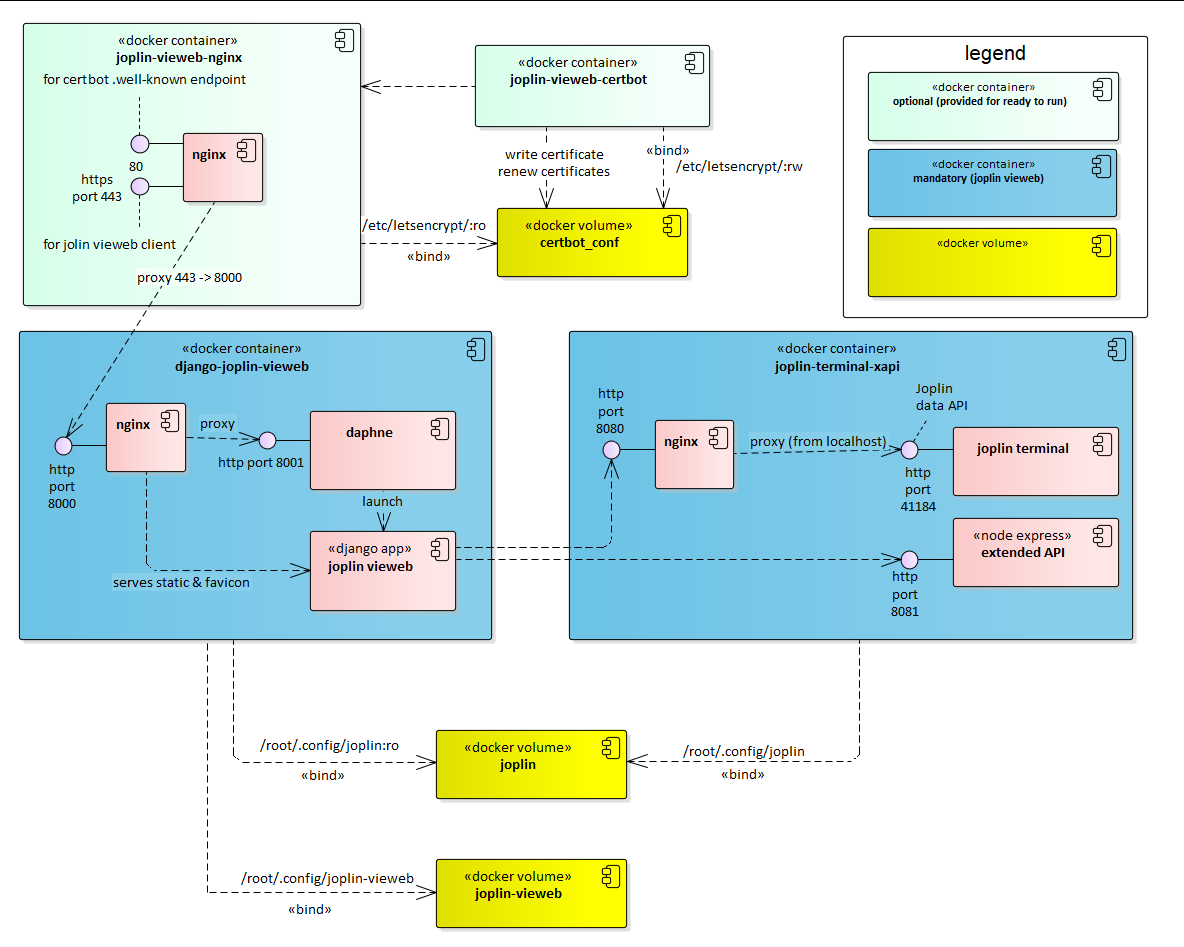
Installation is done with docker-compose. The default docker-compose file installs a nginx server with certbot certificates mechanisms, and listens to ports 80 and 443.
If you have your own server, use docker-compose-joplin-only.yml (todo). Have a look to the containers.
- Prerequisites: your linux system has docker and docker-compose installed
- Enable docker service at system startup
- Get docker-compose.yml (either you clone this git repo, or you copy the file somewhere)
- Edit the 3 variables (x-common-variables block) at the top of docker-compose file:
- ORIGINS: write the domain and/or IP address (only those origins are allowed to access joplin-vieweb)
- If you use nginx and certbot containers:
- CERT_DOMAIN: your domain so let's encrypt can contact (IP address doesn't work: you need a domain)
- CERT_MAIL: a mail needed by let's encrypt.
- And "run"
sudo systemctl enable docker
cd ~
mkdir joplin-vieweb
cd joplin-vieweb
wget https://raw.githubusercontent.com/joplin-vieweb/joplin-vieweb/main/docker-compose.yml
vi docker-compose.yml # edit the x-common-variables (3 variables)
sudo docker-compose up
Congratulation, the server is running. If the system reboots, the server will start automatically (since we enabled docker.service at startup and the services in odcker-compose are set as "restart")
Upgrade
When a new version is available, simply go to your docker-compose file:
sudo docker-compose down
sudo docker-compose up
Configuration
You should configure a synchronisation to secure your notes:
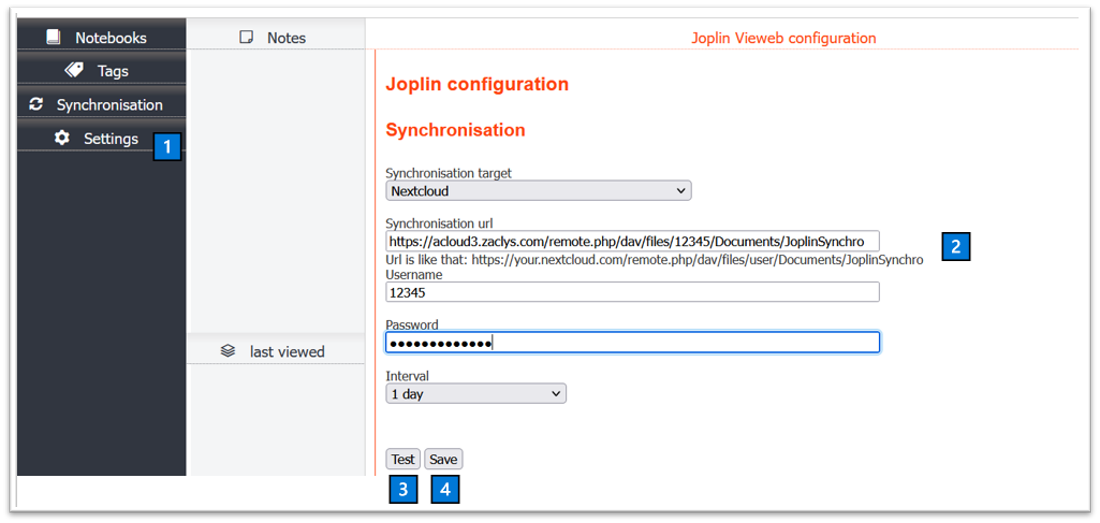
1️⃣ Click the settings tab
2️⃣ Input synchronisation data (only next cloud is supported for now, if you would like other services, ask in a conversation)
3️⃣ Test
4️⃣ If test result is OK: save
If your cloud already contains joplin content, do a synchronisation:
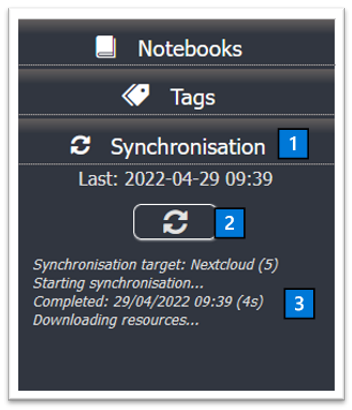
1️⃣ Click the synchronisation tab
2️⃣ click the sync button
3️⃣ Wait for the sync to finish (it may take a long time depending on your cloud content)
Components