Table of Contents
Introduction
Egroupware uses PhPUnit in order to test server side codes. There is usually a test folder in each module or section which holds test codes. Test codes are mostly written in php (some may need json or xml data to pull) and named based on naming convention of UperCamelCase [TestName]Test.php.
For instance, security test file in api loader section is like api/src/loader/test/SecurityTest.php
How to run a test
Install PHPUnit
In order to run a test, first of all you need to install PHPUnit on your dev machine. You can find the installation instruction Here
Run a test in Cli
You can run tests with phpunit command in cli, which usually is running a test against a file to be tested:
phpunit --bootstrap [FileNeedsToBeTested] [RelativeTestFile]
For instance:
> phpunit --bootstrap api/src/loader/security.php api/src/loader/test/SecurityTest.php
PHPUnit 5.1.3 by Sebastian Bergmann and contributors.

...............................                                   31 / 31 (100%)

Time: 1.06 seconds, Memory: 8.00Mb

OK (31 tests, 812 assertions)
The above example shows that our security.php has been gone through 31 tests and 100% passed all of them.
You can run all tests for Egroupware using the phpunit command:
phpunit -c doc
PHPUnit 5.7.4 by Sebastian Bergmann and contributors.

SSSS............................................................. 65 / 76 ( 85%)
...........                                                       76 / 76 (100%)

Time: 25.61 seconds, Memory: 30.00MB

OK, but incomplete, skipped, or risky tests!
Tests: 76, Assertions: 1240, Skipped: 4.
4 tests were skipped in this case because of missing extensions.
Run tests in Netbeans (V8+)
It would be more convenient to be able to run all tests just by pressing one click. For that purpose we can configure PHPUnit test on egroupware's project inside Netbeans and tell the Netbeans to run all or a single test for us, pretty good right?.
PHPUnit in Netbeans needs another module called Skeleton Generator Script which you need to install before the configuration. Learn more about Skeleton Generator installation.
-
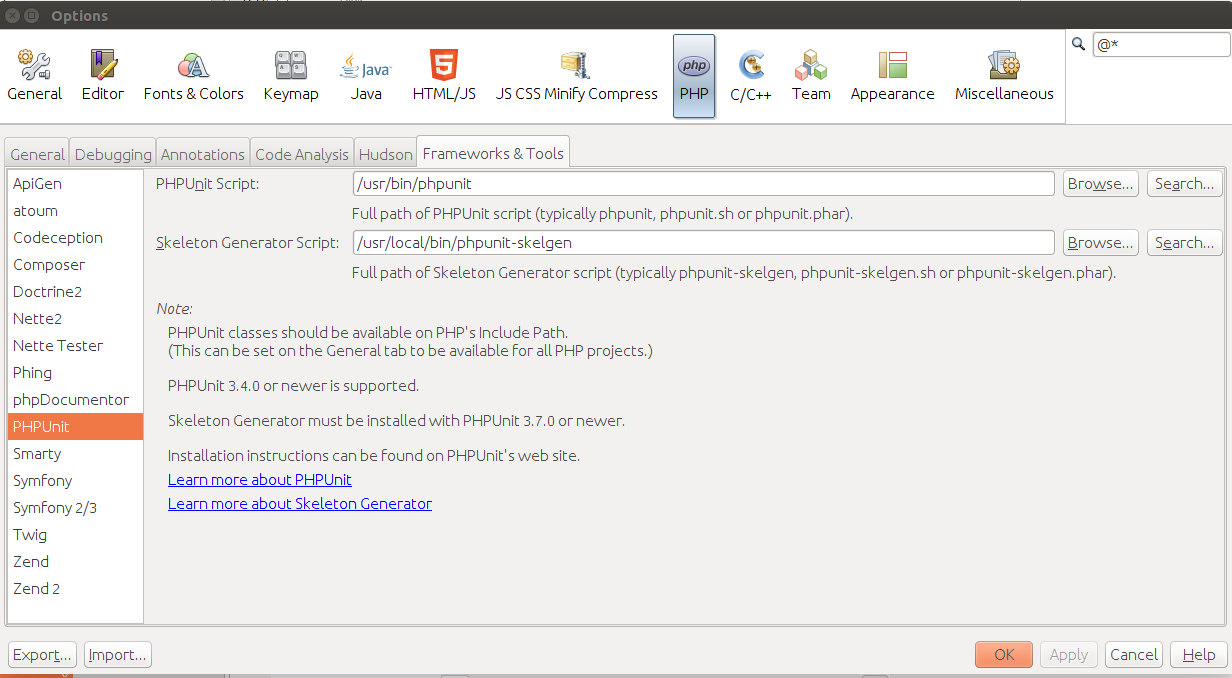
Step 1: Go to Tools -> Options -> PHP -> Frameworks & Tools and configure PHPUnit Script and Skeleton Generator Script.

-
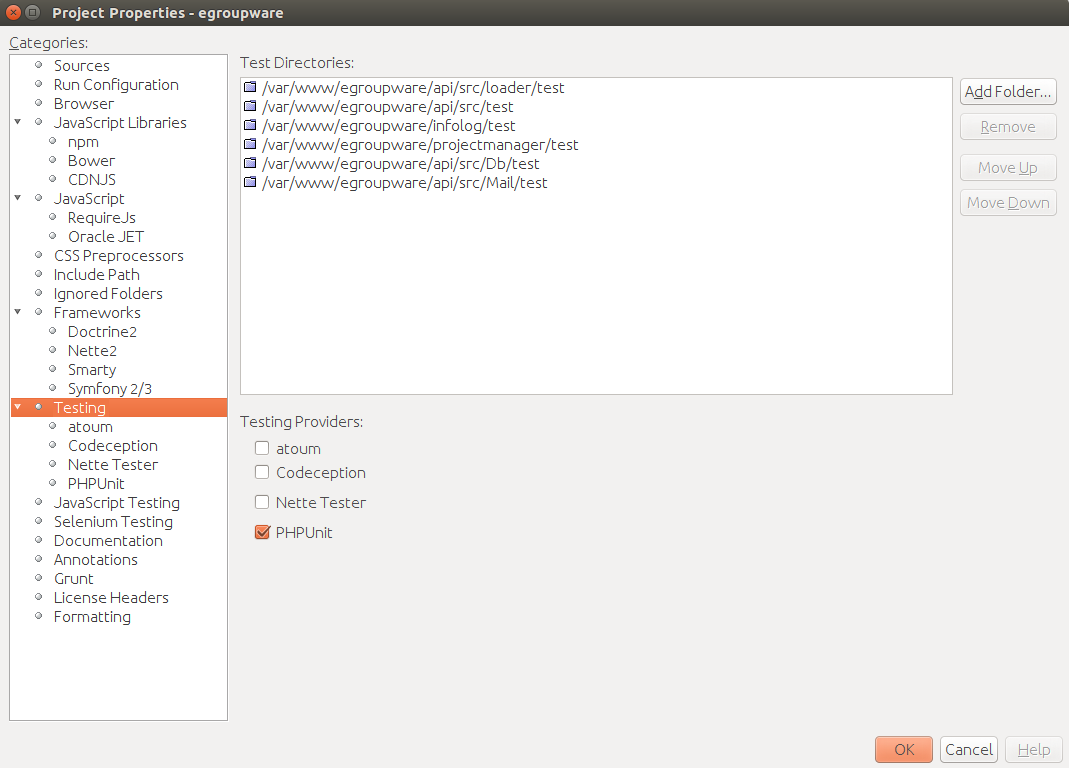
Step 2: Go to project properties -> Testing. There you can add all test folders into "Test Directories", then check mark the PHPUnit as Testing Provider, and click OK.

Note: In case you're wondering where did your test folders just vanish!? Do Not Panic! Netbeans removes them just from Source Files in Projects tree and will add them as Test Files Sections under the project root, and the original test folders are untouched.
-
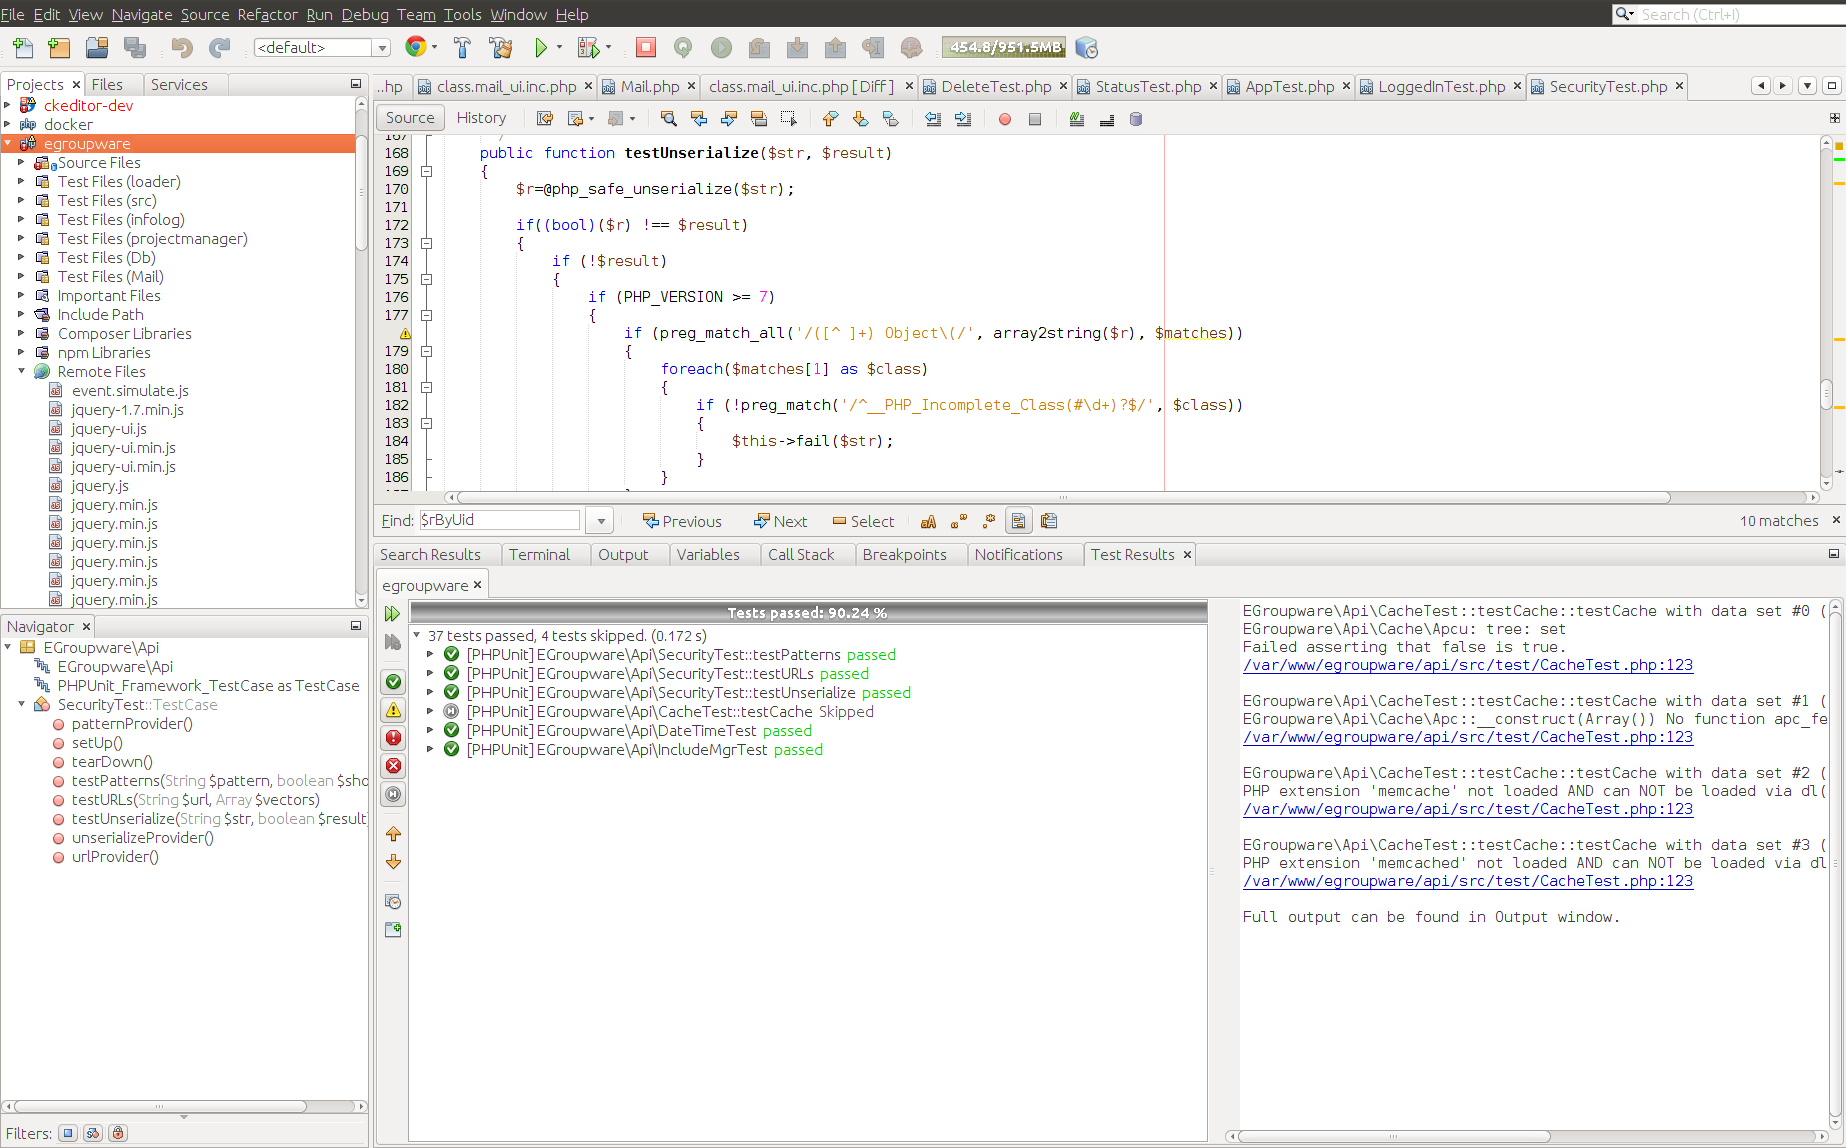
Step3: Now we have everything ready to run the tests. We just need to press "Alt + F6" or right click on project and run Test.

For running individual test we can go to each particular test file and run that test.
| Language: |
- General information
- Distribution specific instructions
- Update recommendations and troubleshooting
- Tuning EGroupware for higher number of users
- Docker-compose installation: Linux, Windows, Mac, Synology, QNAP
- Configure IMAP push
- IMAP Push Notifications for Dovecot 2.2+
- Using EGroupware Mail server with ActiveDirectory
CTI / Computer Telephone Integration
Using SmallPART with a LMS (Moodle, OpenOLAT, ...)
Synchronisation between Untis / Webuntis and EGroupware
Development